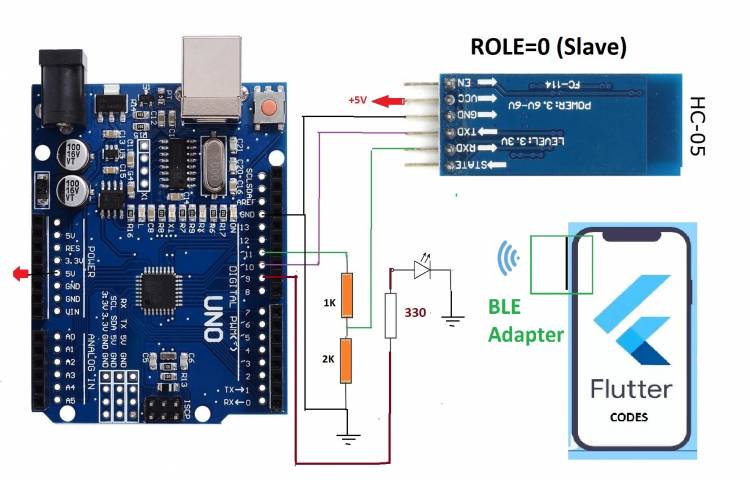
Led Control Application with HC-05 Bluetooth Module
We will use Flutter-Dart and Arduino codes for the LED burning project with an Android phone.
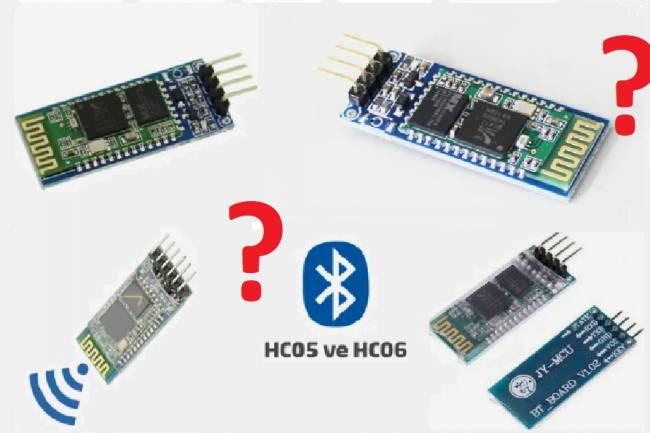
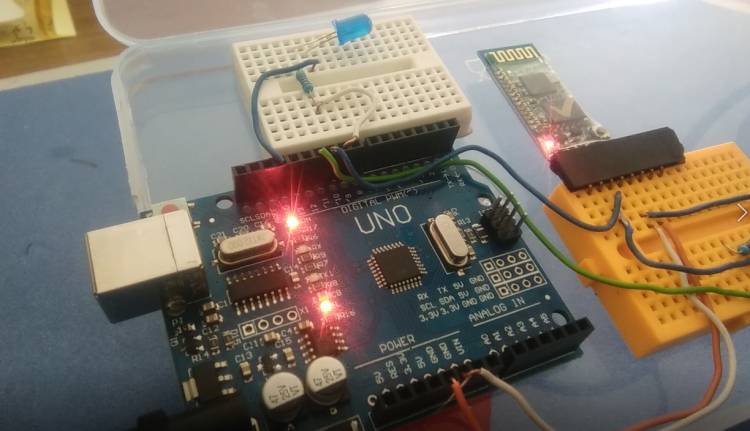
The bluetooth module we will use in the project is the HC-05 module. This module is a very functional and inexpensive module. The HC-05 module can be used in projects in three modes: SLAVE, MASTER and SLAVE-MASTER. We will use this module in SLAVE mode in our project.
Below are the Flutter-Dart codes:
import 'dart:async';
//import 'dart:convert';
import 'package:flutter/foundation.dart';
import 'package:flutter/material.dart';
import 'package:flutter_bluetooth_serial/flutter_bluetooth_serial.dart';
void main() => runApp(const MyApp());
class MyApp extends StatefulWidget {
const MyApp({super.key});
@override
// ignore: library_private_types_in_public_api
_MyAppState createState() => _MyAppState();
}
class _MyAppState extends State<MyApp> {
List<BluetoothDevice> _devices = [];
late BluetoothConnection connection;
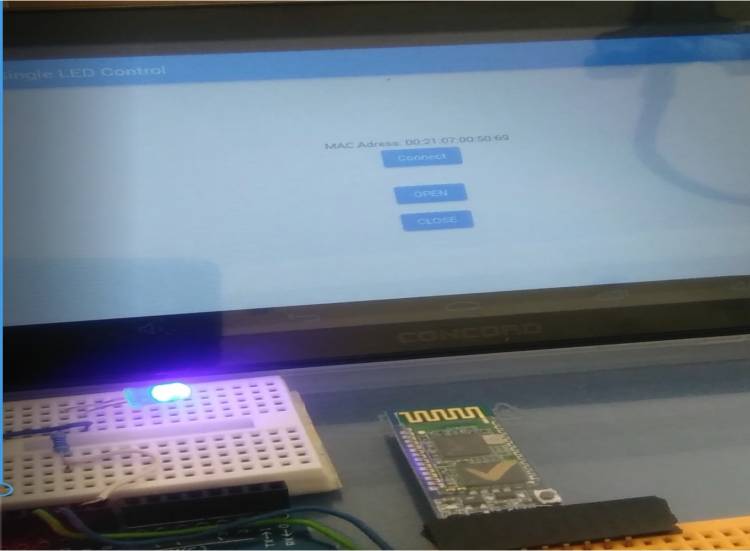
String adr="00:21:07:00:50:69"; // my bluetooth device MAC Adres
@override
void initState() {
super.initState();
_loadDevices();
}
Future<void> _loadDevices() async {
List<BluetoothDevice> devices = await FlutterBluetoothSerial.instance.getBondedDevices();
setState(() { _devices = devices; });
}
//----------------------------
Future<void> sendData(String data) async {
data = data.trim();
try {
List<int> list = data.codeUnits;
Uint8List bytes = Uint8List.fromList(list);
connection.output.add(bytes);
await connection.output.allSent;
if (kDebugMode) {
// print('Data sent successfully');
}
} catch (e) {
//print(e.toString());
}
}
@override
Widget build(BuildContext context) {
return MaterialApp(
home: Scaffold(
appBar: AppBar(
title: const Text("Bluetooth Single LED Control"),
),
body: Center(
child: Column(
mainAxisAlignment: MainAxisAlignment.center,
children: [
const Text("MAC Adress: 00:21:07:00:50:69"),
ElevatedButton(child:Text("Connect"),onPressed: () {
connect(adr);
},),
SizedBox(height: 30.0,),
ElevatedButton(child:Text(" OPEN "),onPressed: () {
sendData("on");
},),
SizedBox(height: 10.0,),
ElevatedButton(child:Text("CLOSE"),onPressed: () {
sendData("off");
},),
],
),
),
)
);
}
Future connect(String address) async {
try {
connection = await BluetoothConnection.toAddress(address);
sendData('111');
//durum="Connected to the device";
connection.input!.listen((Uint8List data) {
//Data entry point
// durum=ascii.decode(data);
});
} catch (exception) {
// durum="Cannot connect, exception occured";
}
}
// --------------**************data gonder
//Future send(Uint8List data) async {
//connection.output.add(data);
//await connection.output.allSent;
}
//------------*********** data gonder end
Arduino codes are below:
#include <SoftwareSerial.h>
SoftwareSerial mySerial(10, 11); // RX, TX
String rec_data="off";
void setup() {
pinMode(9, OUTPUT);
Serial.begin(9600);
mySerial.begin(9600); // BlueTooth Data baud,set the data rate for the SoftwareSerial port
}
void loop() { // run over and over
if (mySerial.available()) {
rec_data=mySerial.readString();
if(rec_data=="on"){digitalWrite(9, HIGH);}
if(rec_data=="off"){digitalWrite(9, LOW);}
Serial.println(rec_data);
delay(100);
}
}