Bluetooth Speaker Project with Flutter - Audio data transfer
How to transfer audio data to bluetooth speaker?
With this project draft, we will also be preparing for the data transfer projects that we will do in the future.
Our project outline is called Bluetooth Speaker. In fact, it is possible to see this application in many products. Many different sound systems can be developed with an amplifier system with a Bluetooth module.
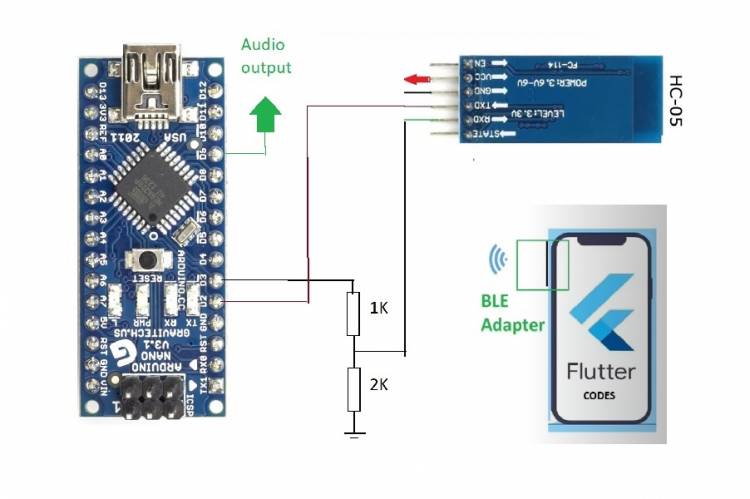
What's in our project outline? An Aduino Nano, an HC-05 bluetooth module, android phone, flutter codes.
We will convert a music file on an Android phone to a byte-numeric format and send it as data to a bluetooth module whose MAC address we know. With the help of the HC-05 connected to the Arduino Nano, we will receive these data and output them as sound from the D9. Since the D9 output is low power, it may be necessary to use an amplifier in real applications. This is optional.
With the help of Artificial Intelligence, we printed the codes.
Let's examine the Flutter codes:
import 'package:flutter/material.dart';
import 'package:flutter_bluetooth_serial/flutter_bluetooth_serial.dart';
import 'package:flutter/services.dart';
import 'dart:io';
import 'dart:async';
void main() => runApp(MyApp());
class MyApp extends StatelessWidget {
@override
Widget build(BuildContext context) {
return MaterialApp(
home: BluetoothSendPage(),
);
}
}
class BluetoothSendPage extends StatefulWidget {
@override
_BluetoothSendPageState createState() => _BluetoothSendPageState();
}
class _BluetoothSendPageState extends State<BluetoothSendPage> {
BluetoothConnection? connection;
bool isConnected = false;
bool isSending = false;
String bluetoothAddress = "YOUR_BLUETOOTH_MODULE_MAC_ADDRESS"; // Replace this with the MAC address of your Bluetooth module.
@override
void initState() {
super.initState();
initBluetooth();
}
Future<void> initBluetooth() async {
try {
bool isEnabled = await FlutterBluetoothSerial.instance.requestEnable();
if (!isEnabled) {
// Bluetooth is not enabled on the device
return;
}
} on PlatformException catch (ex) {
print("Error: ${ex.message}");
}
connectToDevice();
}
Future<void> connectToDevice() async {
try {
BluetoothDevice device =
await FlutterBluetoothSerial.instance.getBondedDeviceByAddress(
bluetoothAddress);
if (device == null) {
print('Bluetooth device not found.');
return;
}
BluetoothConnection newConnection =
await BluetoothConnection.toAddress(bluetoothAddress);
print('Connected to device');
setState(() {
connection = newConnection;
isConnected = true;
});
} catch (ex) {
print("Error: ${ex.toString()}");
}
}
Future<void> sendMusicFile() async {
if (!isConnected) {
print("Not connected to any device.");
return;
}
if (isSending) {
print("Already sending a file.");
return;
}
setState(() {
isSending = true;
});
try {
String filePath = "PATH_TO_YOUR_MUSIC_FILE"; // Replace this with the actual path of the music file on your device.
File file = File(filePath);
List<int> bytes = await file.readAsBytes();
connection!.output.add(bytes);
await connection!.output.allSent;
print("File sent successfully.");
} catch (ex) {
print("Error while sending file: ${ex.toString()}");
}
setState(() {
isSending = false;
});
}
@override
Widget build(BuildContext context) {
return Scaffold(
appBar: AppBar(
title: Text('Bluetooth Music Sender'),
),
body: Column(
children: [
if (isConnected)
Text("Connected to: ${bluetoothAddress}"),
ElevatedButton(
onPressed: isSending ? null : sendMusicFile,
child: Text('Send Music'),
), ], ), ); }}
The Arduino Nano Codes of the Project Draft are below:
#include <SoftwareSerial.h>
SoftwareSerial BTSerial(2, 3); // RX pin, TX pin
const int pwmPin = 9; // Digital 9. pin (PWM out)
void setup() {
pinMode(pwmPin, OUTPUT); // PWM out setting
BTSerial.begin(9600);
}
void loop() {
if (BTSerial.available() > 0) {
int data = BTSerial.read();
data = constrain(data, 0, 255);
analogWrite(pwmPin, data);
}
}
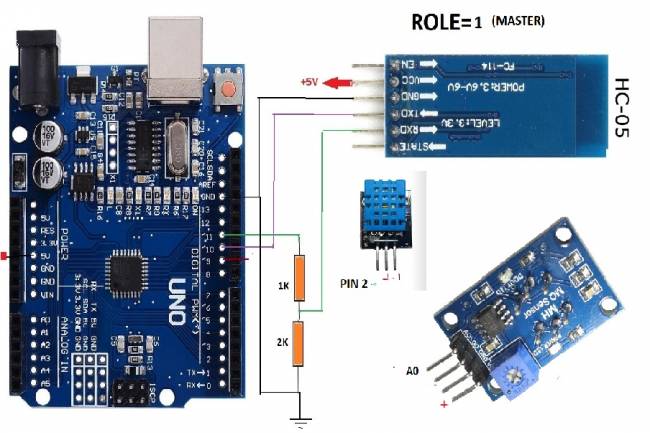
Before the Arduino codes, the ROLE settings of the Bluetooth module must be made. In this project draft, since the HC-05 module will work in SLAVE mode, the setting should be ROLE=0. We have previously published an application video for the HC-05 module settings. Video link: Bluetooth settings Video details - YouTube
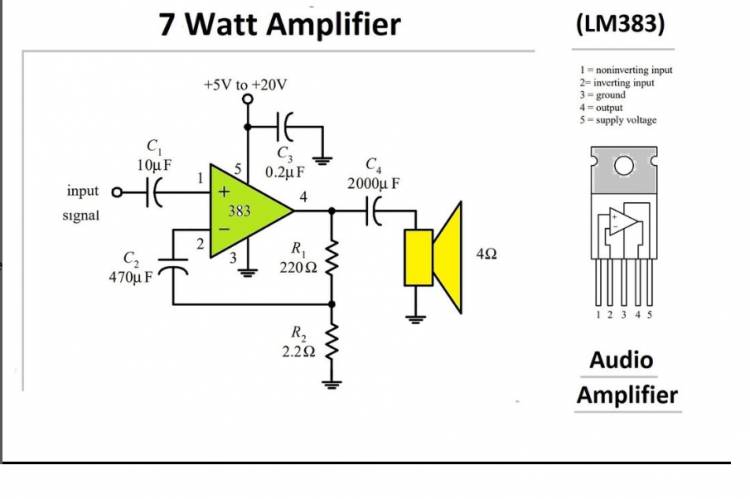
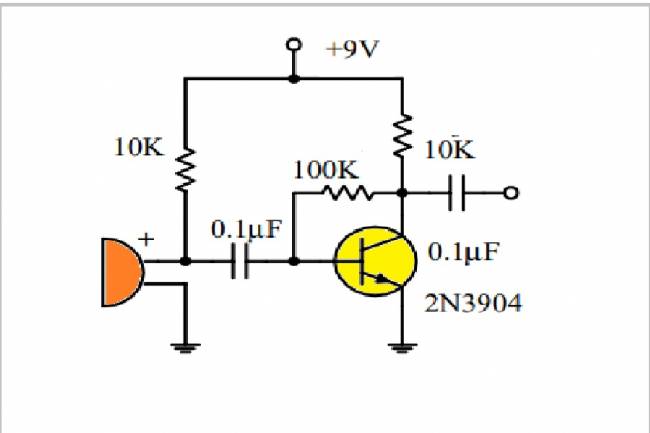
In order to strengthen the audio signal at the D9 output of the Nano, the amplifier circuit we shared on our Instagram account can be used. The amp circuit diagram made with the LM383 is below. Amp and detailed information at the link: Milivolt Net (@milivoltnet) • Instagram photos and videos
Note:
"PATH_TO_YOUR_MUSIC_FILE" datawav.bin : bin file containing audio bytes
