ESP-WROOM-32 and ESP-IDF are a Real-Time Operating System (RTOS).
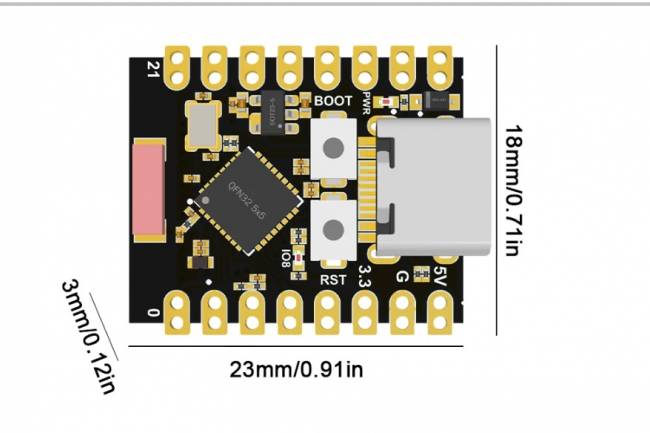
The ESP-WROOM-32 board is a powerful microcontroller manufactured by Espressif that integrates Wi-Fi and Bluetooth features. In this article, we will explain how to use ESP-IDF and RTOS commands in the VSCode environment using the ESP-WROOM-32 card. We will also help you understand these concepts better with some C++ code examples.
ESP-IDF is an official development framework provided by Espressif and is designed for use with the ESP-WROOM-32 board. This framework offers broad hardware and software support and is particularly suitable for IoT (Internet of Things) projects.
Required Tools
1. VSCode Installation: Download and install VSCode from the official website.
2. PlatformIO Plugin: Install the PlatformIO plugin on VSCode. This plugin allows you to easily create and manage ESP-IDF based projects.
3. ESP-IDF Installation: Download and install ESP-IDF from the official GitHub repository.
Creating a Project
1. Open VSCode: Launch VSCode and create a new folder to start a project.
2. Create PlatformIO Project: Go to the "PlatformIO" tab in the left sidebar of VSCode, then click the "Home" tab and create a new PlatformIO project by selecting the "New Project" option.
3. Adjust Project Settings: Open the platformio.ini file of the created project and specify the ESP-IDF version:
[env:esp32]

platform = espressif32

framework = espidf

board = esp32dev
RTOS Commands
RTOS is a feature provided in ESP-IDF and facilitates the management of real-time tasks. Here are the steps to create a simple RTOS task:
1. Create RTOS Task: Add an RTOS task to your main.cpp file as follows:
#include "freertos/FreeRTOS.h"

#include "freertos/task.h"
void rtos_task(void *pvParameter) {

     while (1) {

         // RTOS task here

         vTaskDelay(1000 / portTICK_PERIOD_MS);

     }

}
extern "C" void app_main() {

     xTaskCreate(&rtos_task, "rtos_task", 4096, NULL, 5, NULL);

}
Start RTOS Task: In the app_main function, start the created RTOS task.
C++ Code Examples
1. GPIO Control: A simple C++ code example to control the GPIO pins of ESP32:
#include "driver/gpio.h"
void init_gpio() {

     gpio_config_t io_config;

     io_config.pin_bit_mask = GPIO_Pin_2;

     io_config.mode = GPIO_MODE_OUTPUT;

     gpio_config(&io_config);

}
void toggle_led() {

     while (1) {

         gpio_set_level(GPIO_NUM_2, 1);

         vTaskDelay(1000 / portTICK_PERIOD_MS);

         gpio_set_level(GPIO_NUM_2, 0);

         vTaskDelay(1000 / portTICK_PERIOD_MS);

     }

}
extern "C" void app_main() {

     init_gpio();

     xTaskCreate(&toggle_led, "toggle_led", 4096, NULL, 5, NULL);

}
These examples will help you understand how to use ESP-IDF and RTOS commands in the VSCode environment using the ESP-WROOM-32 board. You can use these examples to adapt them to your own projects and develop powerful IoT applications with ESP32.
Let's add another code example to better explain RTOS. Code example with 2 tasks:
#include "freertos/FreeRTOS.h"

#include "freertos/task.h"

#include "freertos/semphr.h"
SemaphoreHandle_t xSemaphore;
void vTask1(void *pvParameters) {

     while (1) {

         xSemaphoreTake(xSemaphore, portMAX_DELAY);

         printf("Task 1 is running...\n");

         xSemaphoreGive(xSemaphore);
         vTaskDelay(1000 / portTICK_PERIOD_MS);

     }

}
void vTask2(void *pvParameters) {

     while (1) {

         xSemaphoreTake(xSemaphore, portMAX_DELAY);

         printf("Task 2 is running...\n");

         xSemaphoreGive(xSemaphore);
         vTaskDelay(1500 / portTICK_PERIOD_MS);

     }

}
extern "C" void app_main() {

     xSemaphore = xSemaphoreCreateMutex();
     xTaskCreate(&vTask1, "Task 1", 4096, NULL, 5, NULL);

     xTaskCreate(&vTask2, "Task 2", 4096, NULL, 5, NULL);
     vTaskStartScheduler();

}
In this example, two different tasks (vTask1 and vTask2) are defined. Both tasks run at regular intervals and control their entry into the critical region using a shared semaphore. While vTask1 runs every second, vTask2 runs every 1.5 seconds. The vTaskDelay function allows the task to wait for a specified period of time.
In this example, the semaphore is used to control data sharing between two tasks. Semaphore ensures that when one task enters a critical region, another task waits, thus preserving data integrity.


