
Designing an IoT System
In this article, we will try to design an IoT system. We will set an example and look for the answer to the question of how we can make it an IoT system.
The name of this application, which we will design using the installed software on classical web servers, is “GPS tracking system”.
Apache.exe, MySQL.exe, Php.exe programs will be installed and running on our web server. As an example site, we determined the domain iot.milivolt.news.
The hardware and software components of the system will be as follows.
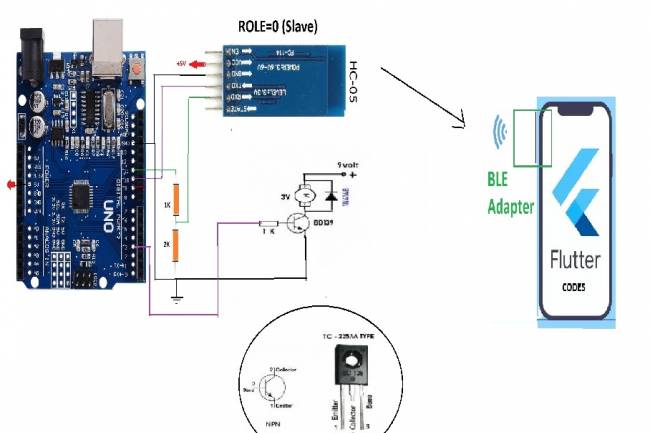
- Microcontroller + Wifi Module + GPS module
- Microcontroller codes
- Data registration codes with php extension on the web server side
- Web server side, real-time positioner html codes on the map
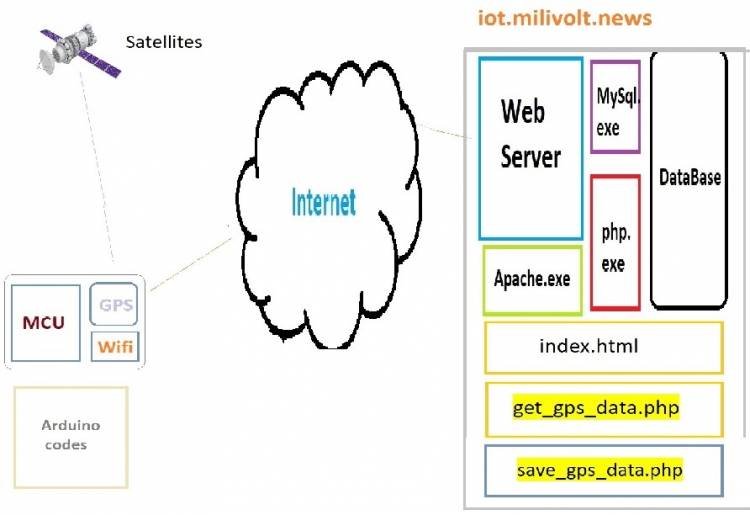
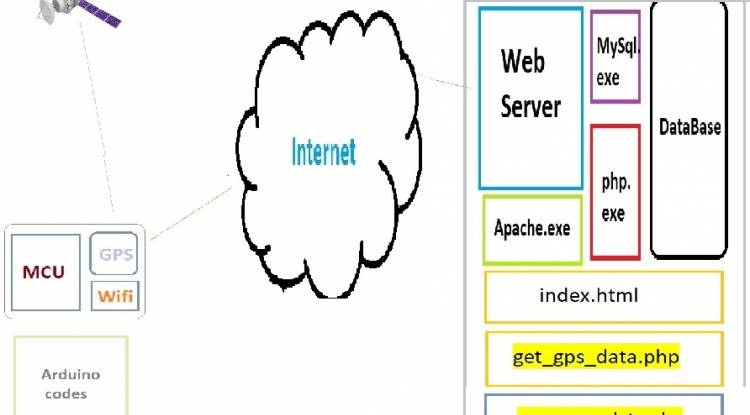
The schematic description of the system is below:
General schema
There are many alternatives as a microcontroller. But we assume that we will use Arduino Uno or Arduino Nano in this application.
Let's take a look at the microcontroller codes right away:
In order to be able to use these modules after the module connections are made to the system, we must first add the module libraries with the "#include" statement. As will be understood immediately, "TinyGPS++" will be used to operate with the GPS module, and "ESP8266Wifi" will be used to operate with the Wifi module.
#include <SoftwareSerial.h>

#include <TinyGPS++.h>

#include <ESP8266WiFi.h>
// WiFi info

const char* ssid = "your WIFI_SSID";

const char* password = "your WIFI_PASSWORD";
// GPS pins

const int GPS_RX_PIN = 2;

const int GPS_TX_PIN = 3;
// GPS object

TinyGPSPlus gps;
// WiFi object

WiFiClient client;
// Iot.milivolt.News addrs.and port number (80, for http)

const char* server = "iot.milivolt.news";

const int port = 80;
void setup() {

   // Serial baud rate

   Serial.begin(9600);
   // WiFi connect

   WiFi.begin(ssid, password);


   while (WiFi.status() != WL_CONNECTED) {

     delay(1000);

     Serial.println("WiFi waiting...");

   }
   Serial.println("WiFi connected!");

}
void loop() {

   // read data from GPS

   while (Serial.available() > 0) {

     if (gps.encode(Serial.read())) {

       if (gps.location.isValid()) {

         // GPS coord.

         float latitude = gps.location.lat();

         float longitude = gps.location.lng();


         // send GPS data to server (iot.milivolt.news)

         sendGPSData(latitude, longitude);


         // 2 seconds wait

         delay(2000);

       }

     }

   }

}
void sendGPSData(float latitude, float longitude) {

   // connect to server

   if (client.connect(server, port)) {

     // GPS data

     String gpsData = "latitude=" + String(latitude, 6) + "&longitude=" + String(longitude, 6);


     // HTTP POST request

     String postRequest = "POST /save_gps_data.php HTTP/1.1\r\n";

     postRequest += "Host: " + String(server) + "\r\n";

     postRequest += "Content-Type: application/x-www-form-urlencoded\r\n";

     postRequest += "Content-Length: " + String(gpsData.length()) + "\r\n";

     postRequest += "Connection: close\r\n\r\n";

     postRequest += gpsData;


     // POST to server

     client.print(postRequest);


     // Get response from server

     while (client.connected()) {

       if (client.available()) {

         String response = client.readStringUntil('\r');

         Serial.println(response);

       }

     }


     // close port

     client.stop();

   } else {

     Serial.println("Could not connect to server!");

   }

}
After receiving the GPS data with the sendGPSData(float latitude, float longitude) line, it is sent to the server. On the server side, there should be a file with the extension "php" that receives these data. The name of this file is “save_gps_data.php”. These codes on the web server side are below:
On the web server side, a database must have been created before. We record two GPS data on our table with the registration codes of the database, the user name and password of which are specified.
<?php

// Enter the required information for the database connection

$servername = "localhost";

$username = "mysql_user";

$password = "mysql_password";

$dbname = "database_name";
// receive POST Data

$latitude = $_POST['latitude'];

$longitude = $_POST['longitude'];
// Connect to Database

$conn = new mysqli($servername, $username, $password, $dbname);

if ($conn->connect_error) {

     die("Database connection failed: " . $conn->connect_error);

}
// record to GPS data

$sql = "INSERT INTO gps_data (latitude, longitude) VALUES ('$latitude', '$longitude')";

if ($conn->query($sql) === TRUE) {

     echo " GPS data saved successfully.";

} else {

     echo "Error: " . $sql . "<br>" . $conn->error;

}
// Close the database connection

$conn->close();

?>
Due to the delay(2000) line we wrote in Arduino codes, these php extension codes will run every 2 seconds. The duration can be changed if desired.
Now it's time to display this GPS data on a map. For this, a file with the extension "html" is needed. In the html file below, there are JavaScript codes that pull the GPS data recorded in the database at certain time intervals. Let the name of this file be index.html.
<!DOCTYPE html>

<html>

<head>

   <meta name="viewport" content="initial-scale=1.0">

   <meta charset="utf-8">

   <title>GPS Data</title>

   <style>

     #map {

       height: 400px;

       width: 100%;

     }

   </style>

</head>

<body>

   <h1>GPS Data</h1>

   <div id="map"></div>
   <script>

     function initMap() {

       // Create a map

       var map = new google.maps.Map(document.getElementById('map'), {

         zoom: 15,

         center: {lat: 0, lng: 0}

       });
       // get GPS data and marker

       setInterval(function() {

         fetchGPSData(map);

       }, 2000);

     }
     function fetchGPSData(map) {

       // get GPS data

       fetch('http://iot.milivolt.news/get_gps_data.php')

         .then(response => response.json())

         .then(data => {

           // Mark the GPS data on the map

           var latitude = parseFloat(data.latitude);

           var longitude = parseFloat(data.longitude);
           var marker = new google.maps.Marker({

             position: {lat: latitude, lng: longitude},

             map: map

           });
           // Updates maps center

           map.setCenter({lat: latitude, lng: longitude});

         })

         .catch(error => {

           console.log('Error:', error);

         });

     }

   </script>

   <script async defer

     src="https://maps.googleapis.com/maps/api/js?key=YOUR_API_KEY&callback=initMap">

   </script>

</body>

</html>
Among these codes, there is a "get_gps_data.php" that pulls the codes from the database in the background. These codes are below:
<?php

// Enter the required information for the database connection

$servername = "localhost";

$username = "mysql_user";

$password = "mysql_password";

$dbname = "database name";
// Connect to database

$conn = new mysqli($servername, $username, $password, $dbname);

if ($conn->connect_error) {

     die("Database connection failed: " . $conn->connect_error);

}
// Get latest GPS data from database

$sql = "SELECT latitude, longitude FROM gps_data ORDER BY id DESC LIMIT 1";

$result = $conn->query($sql);
if ($result->num_rows > 0) {

     // Get the latest recorded GPS data

     $row = $result->fetch_assoc();

     $latitude = $row["latitude"];

     $longitude = $row["longitude"];


     // Generate the JSON data

     $data = array(

         'latitude' => $latitude,

         'longitude' => $longitude

     );


     // Send JSON data as output

     header('Content-Type: application/json');

     echo json_encode($data);

} else {

     echo "GPS data not found.";

}
// close connect

$conn->close();

?>
Let's make an evaluation about the project design:
The microcontroller software receives the coordinate data via the GPS module and sends it to the iot.milivolt.news server via the WiFi module. The data coming to the server is saved to the database via “save_gps_data.php”.
The index.html file on the iot.milivolt.news site, on the other hand, visualizes the GPS data with the help of the javascript codes it contains.
The general structure and operation of our project will be like this. This project was designed for experimental purposes. Many features can be added to the project. For example, a membership system can be added so that many users can record and monitor their own tracking data.
In order for multiple IoT (MCU+Wifi+GPS) to be added to the system, a separate credential must also be given to each IoT object.
This tracking system can be used for different purposes depending on the type of things being tracked. If we are tracking motor vehicles, fuel consumption and fuel expenses can also be monitored using the recorded tracking data.