
IR Sensor Application
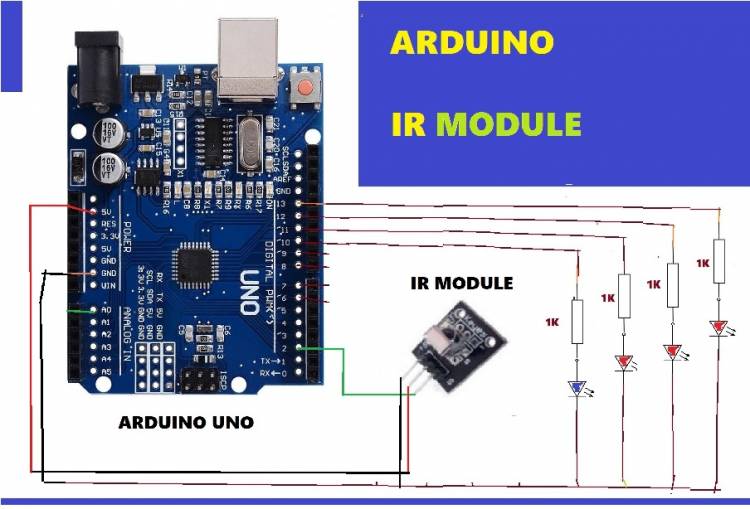
In this application, we will flash three LEDs with an IR control. We will use the Infrared Sensor VS1838 receiver module as the IR receiver.
Youtube Channel:
First of all, we need to add the “IRremote.h” library in the Arduino IDE code screen. As seen in the codes below, we do this with the "#include <IRremote.h>" line.
First of all, we need to add the “IRremote.h” library in the Arduino IDE code screen. As seen in the codes below, we do this with the "#include <IRremote.h>" line.
We connect the signal pin of the sensor module to pin 2 of our UNO card.
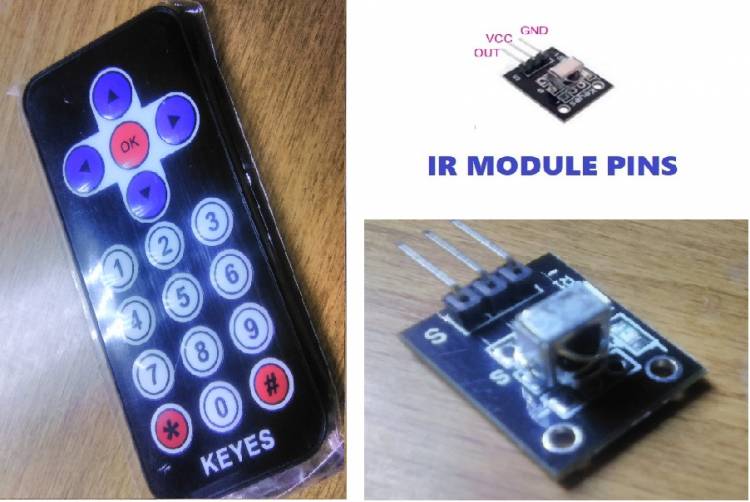
Each of the keys on the IR remote has a 16-digit equivalent. In the codes below, the equivalents of the keys 1, 2 and 3 in the 16-number system are seen.
As the keys are pressed, we detect which key was pressed with the help of the “if” command and turn on the relevant led. Again, we use the "digitalWrite" command to light the LEDs.
Codes:
#include <IRremote.h>
const int RECV_PIN = 2;
IRrecv irrecv(RECV_PIN);
decode_results results;
//botton KEY codes<--------------------------------*****************
long b1 = 0xFF6897; // 1
long b2 = 0xFF9867; // 2
long b3 = 0xFFB04F; // 3
// long b4 = 0xFF30CF; // 4
void setup(){
pinMode(RECV_PIN, INPUT);
Serial.begin(9600);
irrecv.enableIRIn(); // Start the receiver
pinMode(13, OUTPUT);
pinMode(12, OUTPUT);
pinMode(11, OUTPUT);
}
void loop(){
if (irrecv.decode(&results)){
Serial.println(results.value, HEX);
irrecv.resume(); // Receive the next value
if (results.value == b1 ) {digitalWrite(13,HIGH); delay(500);digitalWrite(13,LOW);}
if (results.value == b2 ) {digitalWrite(12,HIGH); delay(500);digitalWrite(12,LOW);}
if (results.value == b3 ) {digitalWrite(11,HIGH); delay(500);digitalWrite(11,LOW);}
}}