IoT System Design 2- Sending Temperature and Humidity Data to Web Server with Arduino
Arduino is a widely used platform for embedded systems and electronics projects.
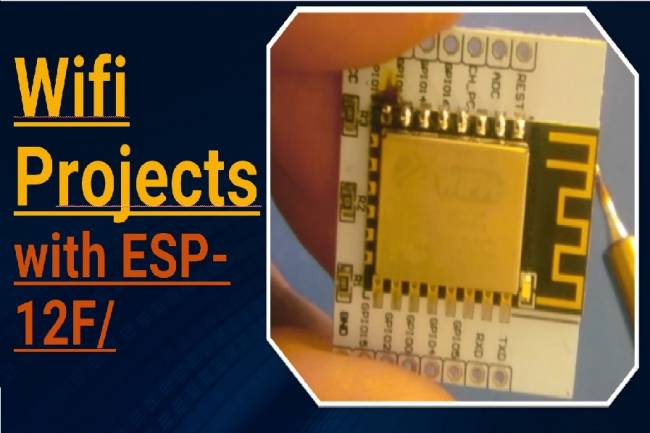
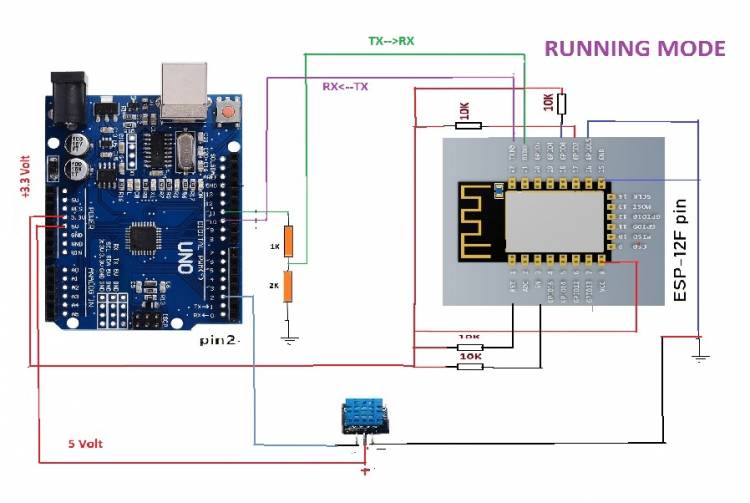
In these projects, we may generally want to read environmental data with various sensors and transmit this data to a server on the internet. In this article, you will learn how to send data from the DHT11 temperature and humidity sensor using Arduino to a web server using a Wi-Fi module (ESP 12F).
Components Used
Arduino (for example Arduino Uno)
ESP 12F Wi-Fi Module
DHT11 Temperature and Humidity Sensor
Descriptions of Arduino Code
#include <SoftwareSerial.h>
#include <dht11.h>
// Wi-Fi connection information
const char* ssid = "pointx";
const char* password = "123456789";
// Web server information
const char* server = "iot.milivolt.com.tr"; // address of the web server
const int serverPort = 80; // HTTP port
const char* path = "/receive_data.php"; // GET request path
SoftwareSerial espSerial(10, 11); // RX and TX pins of the ESP12f module
#define DHT11PIN 2

dht11 DHT11;
void setup() {

   Serial.begin(9600);

   espSerial.begin(115200);
   connectWiFi(); // Wi-Fi connection is made

}
void loop() {

   int chk = DHT11.read(DHT11PIN);
   float humd = (float)DHT11.humidity;

   float temp = (float)DHT11.temperature;
sendDataToServer(temp, humd); // Data is sent to the server
   delay(5000); // wait for 5 seconds

}
// Allows you to connect to the Wi-Fi network

void connectWiFi() {

   espSerial.println("AT+RST"); // ESP12f module is reset

   delay(1000);
   espSerial.println("AT+CWMODE=1"); // The module is put into client mode

   delay(1000);
   espSerial.print("AT+CWJAP=\"");

   espSerial.print(ssid);

   espSerial.print("\",\"");

   espSerial.print(password);

   espSerial.println("\"");

   delay(5000); // wait for 5 seconds

}
// Sends sensor data to web server

void sendDataToServer(float value1, float value2) {

   espSerial.println("AT+CIPMUX=0"); // Single connection mode is selected

   delay(1000);
String getRequest = "GET " + String(path) + "?deg1=" + String(value1) + "°2=" + String(value2) + " HTTP/1.1\r\n" +
"Host: " + String(server) + "\r\n\r\n";
   espSerial.println("AT+CIPSTART=\"TCP\",\"" + String(server) + "\"," + String(serverPort));

   delay(3000); // Waiting for server connection
   espSerial.println("AT+CIPSEND=" + String(getRequest.length()));

   delay(1000);
   espSerial.println(getRequest);

   delay(1000);
   espSerial.println("AT+CIPCLOSE"); // Connection is closed

}
How the Code Works
1. The libraries used are imported (#include statements).
2. The functions required to connect to the Wi-Fi network are defined (connectWiFi()).
3. In the main setup() function, the serial communication speeds are initialized, the ESP12f module is reset and put into client mode.
4. The loop() function runs continuously:
Temperature and humidity data are read from the DHT11 sensor.
This data is transmitted to the web server using the sendDataToServer() function.
A certain time (5 seconds) is expected.
5. The sendDataToServer() function creates an HTTP GET request using the ESP 12f module and sends it to the server. The connection is terminated.