Mobile Application Development for Smart Homes
How to Develop a Mobile Application with Flutter for Smart Home Systems?
In this article, we will show you a way to develop mobile applications with wifi communication for smart homes.
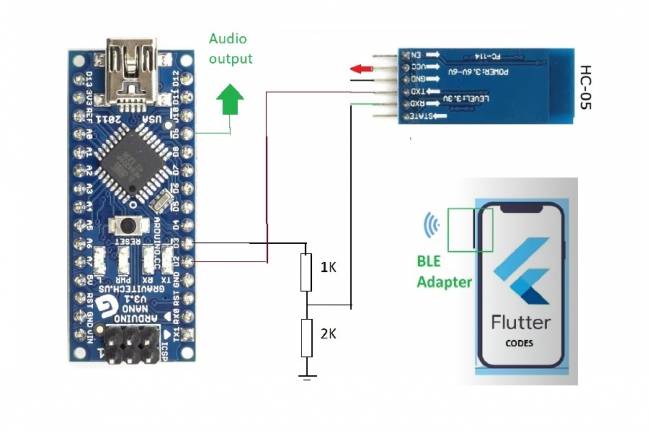
We have previously made BlueTooth and Wifi applications on our site. We have shown how to make mobile applications within Bluetooth applications. We have shown code examples and hardware connections for sending and receiving data from Bluetooth-enabled devices.
Another communication protocol used in smart home systems is the wifi protocol. Many devices such as lamps, air conditioners, televisions, thermostats, motors with wifi can be controlled and these devices can be monitored. Wi-Fi communication is a widely used form of communication for device management, smart home management from local networks or wide networks.
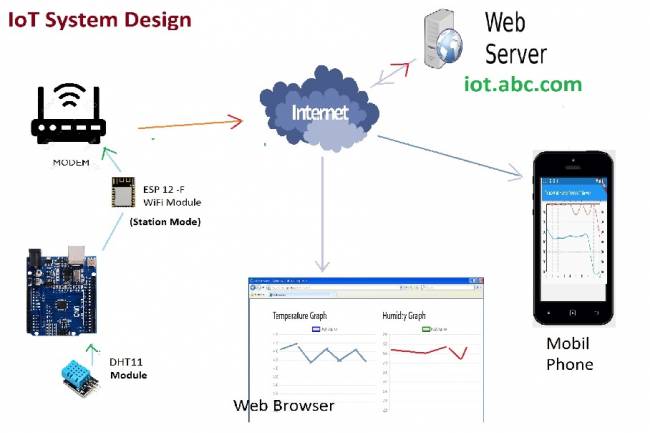
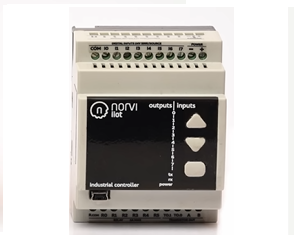
We showed the system connected to the wifi module, which we will give as an example, in the previous article. The system is a system that is connected and managed by typing the IP address on a web browser. https://milivolt.news/post/using-as-web-server-with-esp-12f-wifi-module.
If we want to connect and manage this system with Mobile application, we need to know how to make this mobile application. The basic example we made with Flutter-Dart is a good example of how to connect a wifi module connected system with a mobile app.
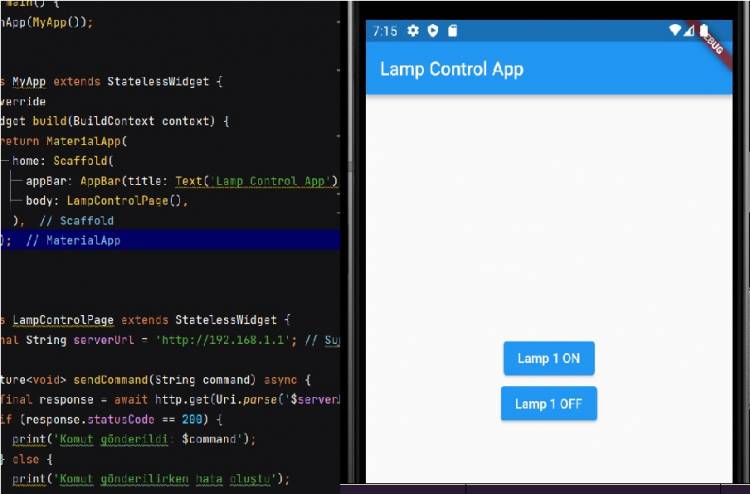
Below are the code sample and explanations we wrote with Flutter-Dart. The http.dart library in these codes allows us to send commands how to connect to the wifi device in a network connected to wifi. The MCU system installed as a Web Server on the Wifi network has an IP and our mobile application connects to the Web Server over this IP. It sends instructions to the Web Server with the "GET" method.
Flutter-Dart Codes:
import 'package:flutter/material.dart'; // We are importing the Flutter material design library.

import 'package:http/http.dart' as http; // The library used to make HTTP requests.
void main() {

   runApp(MyApp()); // runApp() is used to start the application.

}
class MyApp extends StatelessWidget {

   @override

   Widget build(BuildContext context) {

     return MaterialApp(

       home: Scaffold(

         appBar: AppBar(title: Text('Lamp Control App')), // Title that appears in the application bar.

         body: LampControlPage(), // Using LampControlPage as main page content.

       ),

     );

   }

}
class LampControlPage extends StatelessWidget {

   final String serverUrl = 'http://192.168.1.3'; // IP address of the server. It may need to be replaced.
   Future<void> sendCommand(String command) async {

     final response = await http.get(Uri.parse('$serverUrl/$command')); // Sending an HTTP GET request to the server.

     if (response.statusCode == 200) {

       print('Command sent: $command'); // If the request is successful, notify that the command was sent.

     } else {

       print('Error sending command'); // Send error message in case of error.

     }

   }
   @override

   Widget build(BuildContext context) {

     return Center(

       child: Column(

         mainAxisAlignment: MainAxisAlignment.center,

         children: <Widget>[

           ElevatedButton(

             onPressed: () {

               sendCommand('lamp/on'); // Sends the "lamp/on" command when the "Lamp 1 ON" button is pressed.

             },

             child: Text('Lamp 1 ON'), // Text of the "Lamp 1 ON" button.

           ),

           ElevatedButton(

             onPressed: () {

               sendCommand('lamp/off'); // Sends the "lamp/off" command when the "Lamp 1 OFF" button is pressed.

             },

             child: Text('Lamp 1 OFF'), // Text of the "Lamp 1 OFF" button.

           ),

         ],

       ),

     );

   }

}